I just made myself 4 looms over the weekend and had the foresight to take some pics.
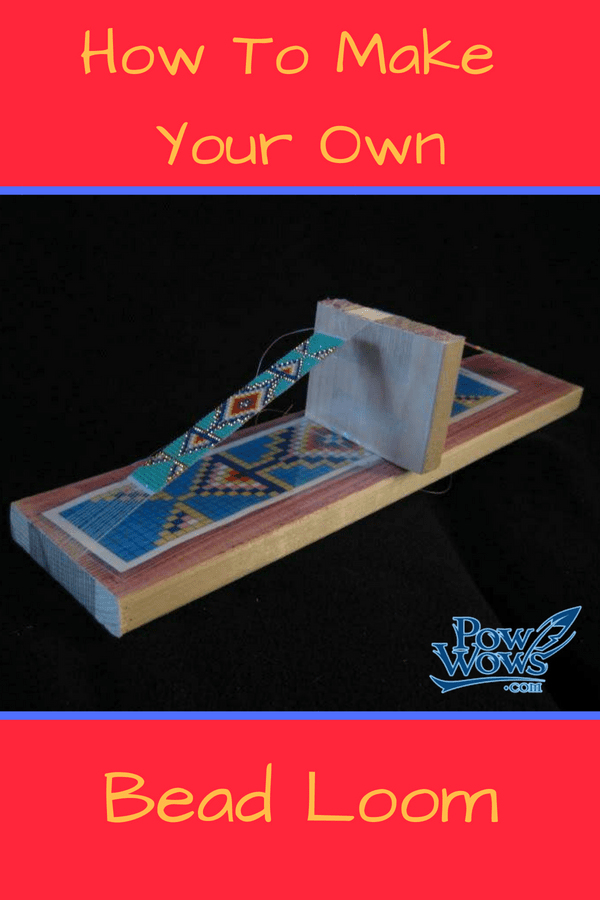
It's a very simple loom…no need to mess with screws,nails, etc
Bead Loom Supply List
Supply list: 1″ x 4″ board, wide Strapping tape
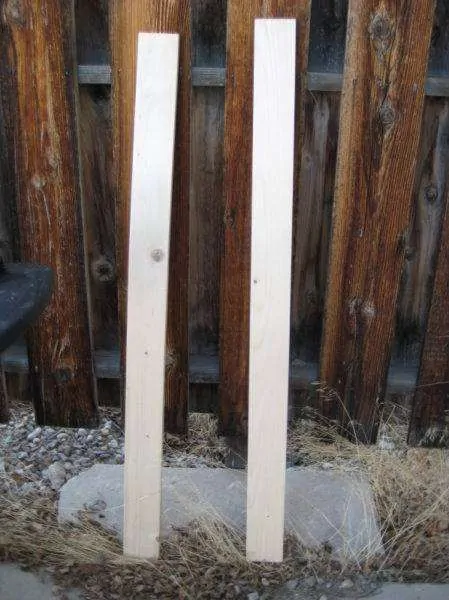
I bought a 8 foot board and had the lumber yard cut it in half to fit in my car.
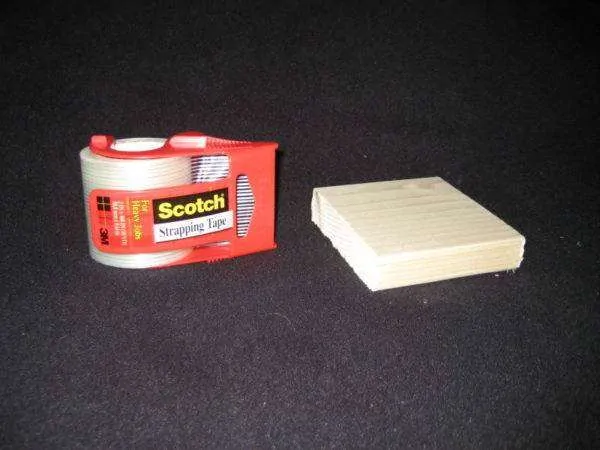
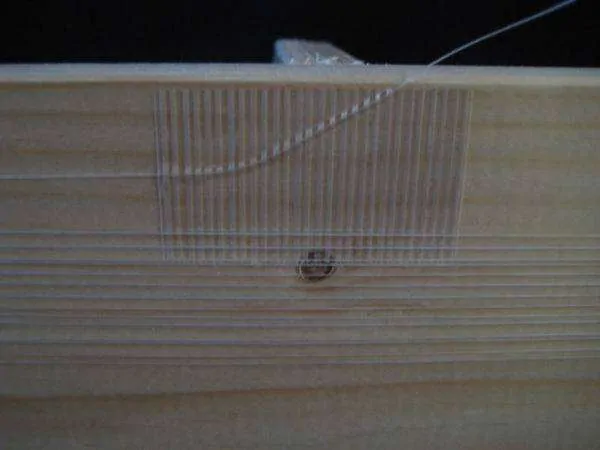
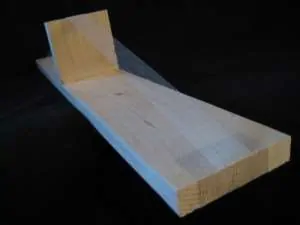
Here's a pic of the strapping tape I used and one of the spacer blocks I cut out.
Of course, the lumber yard didn't cut my board EXACTLY in half, so I took the longer side and cut in 3 equal pieces about 18 inches long.
If I was thinking I would have had my measurements ready and had them cut all my pieces right there with their nice saw.
I cut various spacer blocks from the shorter piece of wood ranging from 2 1/2 inches, 3 inches, 3 1/2 and 4 inches until I had a 24″ piece of board left.
I didn't know which dimension I would like best for the spacer blocks so I thought I'd try several. I like the 2 1/2 (maybe would even like 2 inch) spacer for the shorter loom and 3 inch for the 24 inch long one.
I've seem looms up to 36 inches (for LONG belts) and I think a 3 inch spacer would still be ok for that size. You can also get a wider board for wider projects.
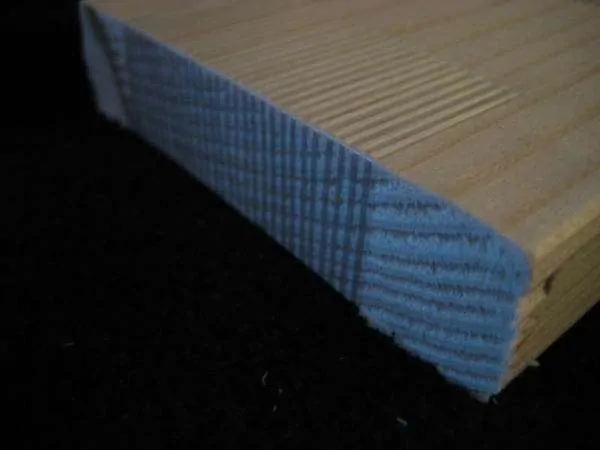
Take about a 3 inch long piece of the strapping tape and tape over each end of the longer loom boards and the spacer blocks. Pull the tape snugly and don't get any puckers.
I'm only making loomed strips 13 beads wide. If you were going to make something wider than the tape, you can slightly overlap 2 pieces the tape, matching the fiber strands.
Secure the end of your thread to the bottom of the loom board. I just used tape, but am looking for a couple flat tacks to tie the thread ends too.
I didn't get a pic of the actual threading, but you set the spacer block in the middle of the loom, hold it with your thumb, and wrap the tread clear around the loom.
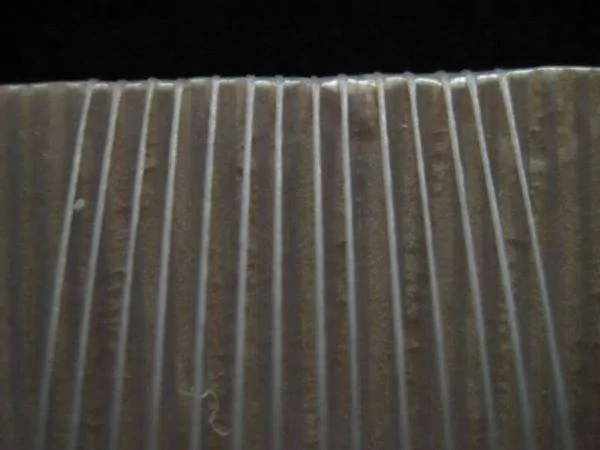
The thread will naturally fall in the spaces between the fibers in the tape. It's not important to get all the threads in the correct spaces right now. Just remember to wrap one more thread than the number of beads in your design.
IE, my design is 13 beads wide so I wrapped 14 threads around.
You can just tape the end of the thread when done. I usually do this at an angle, cuz it's easy to pull loose when taped straight down.
You'll need to adjust the threads so they fall in the correct spacing between the fibers in the tape, and are all parallel. Long fingernails work good for this or a pencil or safety pic. A small crochet hook (0 or 00) would be superb.
After we got the threads right, we taped over all the threads on the bottom of my daughter's loom. I didn't feel the need to do that, plus I'm going to adjust mine later on.
Your threads should be very snug. When you push down across all the threads you should feel the slightest bit of bounce. If it pushes down too much, you can loosen the spacer block, take off the end of the thread, pull it tighter, then resecure, and then stand the spacer block straight up again.
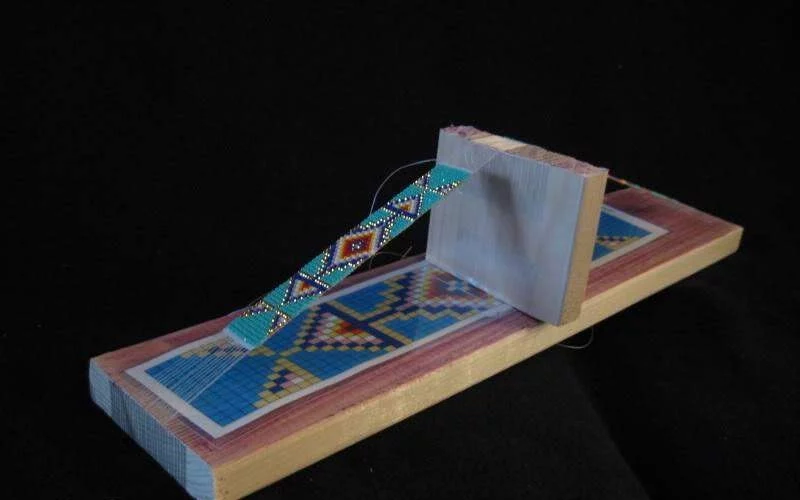
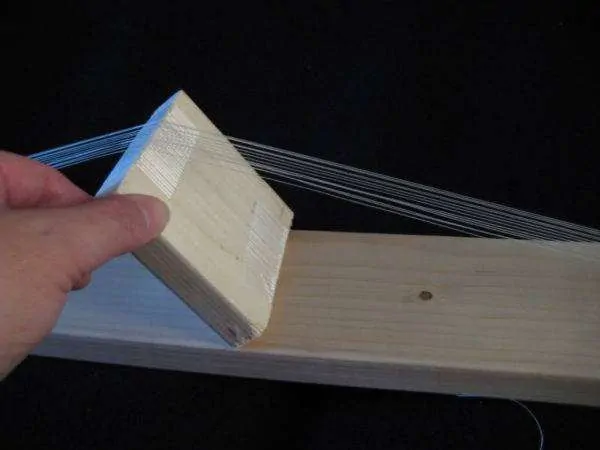
This pic shows how the spacer block is not attached and can be slid in either direction as needed or for tightening the thread.
Here's the strips I beaded Sunday. It was very cool to be able to place my pattern under the spacer block to keep it in place.
Now (to save thread) I'm going to loosen the spacer block, rotate the threads so the already beaded strips are on the back on the loom and make a couple more strips on the top.
This is also how you can make a LONG belt on a 36″ loom. You just rotate it around and could actually get a 70 inch strip on a loom that size.
I “burnished” this loom with a brown crayon by rubbing it all across the wood, then buffing with a paper towel. I could not see the white thread across the white board when I got started.
Posted on the PowWows.com Forums by wyo_rose.
Read the original thread.
Last Updated on January 17, 2023 by Paul G

Carroll
says:Judy P
says:I like the idea of making my own loom, have you seen the ones very similar to yours except they use a spring across the ends of the boards, put a small nail on the back, and then place the beading string in between the coils of the spring. You loop the ends of the threads around the nail on the back and tie them off. What do you think of that way?
Ellis Taylor
says:Tension looms have become the most popular type of looms for bead work. However if you are interested in a more Historic type of loom work. Try to find a copy of David Dean’s “Beading in the Native American Tradition”. Unfortunately it is out of print, but there are copies available on some used book seller sites. This book describes a more Traditional version of “Loom Bead Work”, using a fixed wooden “Heddle” to weave beads in place. The finished work is much more durable and stable than tension work!
Sbhanna
says:The packing tape idea is very clever!
Nancy
says:It doesn’t say how to put the beads on the threads. Do you pull each one out of the tape, put the bead on then re-tape it?
Sherry
says:Nancy, you don’t put beads on these threads. These are the warp threads. You tie a new thread to one outside thread and put enough beads on your needle to fill the spaces between these threads. Bring the beads into position with the needled thread under the warp threads then see through through the beads back the way you came over top of the warp threads. This produces a single line of beading. To make something as large as a bracelet you will use about 80 rows of 11/0 beads. Even number warp threads produce odd bead patters (have a centre)
Vanessa Estes
says:Can anyone suggest where to buy beads? I’m new to heading and quickly discovered that the beads that come all in a set at the craft store are not great–warped, different sizes, etc. Is this just how beads are, or is there a quality difference? Also, in the craft stores the colors are limited and you pay a lot for a tiny bag. Advice would be most appreciated. TIA
Judy P
says:Fire Mountain Beads has great beads and if you order THROUGH JetBeads.com, Jason can get you the 200 pc price on any amount of beads you want to order. I don’t bead much any more due to my eyes getting worse, but I also used to order from a woman on ebay and this is the link to her store.
http://stores.ebay.com/shoshoneways?_rdc=1
Good luck
Vanessa Estes
says:Thank you so much!
Jessie Van Djk
says:order TOHO beads……….. they are the best
……also, order your beads from Jill Wiseman.
Nancy Jusseaume
says:A’ho for this. I have been making dream catchers most of my life and now want to learn so much more from my native heritage. This is a great start!
Beth Castaneda
says:Very grateful for your offering to give this information on making a loom for beading. Loved to weave at one time.
Glenna Jean Gibson
says:I love the strapping tape idea and will give it a try.
Jess Hahn
says:I really love the simplicity of you loom. However I do have a question. How do you attach the strings you are beading with? Do you tie them in the back? I have used loom that have screws or nails to tie off to on the sides but there aren’t any on this model. Thank you for you help and for sharing.
Dee Huffman
says:Thank you for sharing. I don’t have the skills to make this but I am very interested in beading in traditional Tribal Patterns.
Sandy R. You can just use graph paper.
Dee
Sandy R.
says:I love the loom you have shared but I used to have a book that had lots of different bead designs and at the end of the book were pages of blank graph for beading. I have looked all over for simular books for many different designs and can’t find one anywhere. Anyone have an idea where I may be able to find a book like that? I would be very grateful. Thanks so much.
Judy P
says:Sandy R. several of the beading sites like Fire Mountain Gems, Beadaholic, and Fusion Beads have links for free graph paper for several different stitches. Good Luck! 🙂
Vanessa Estes
says:Thank you so much!!
Judy P
says:I would love to figure out how to make a loom like the Rick’s loom where you only have 2 warp threads to deal with when you are done.
Claire Talltree
says:I use a comb on either side of the threads, to help keep them apart. I put the comb in place at the beginning and then wrap the threads around both them and the boards… it helps immensely to keep things in place. They can be cut free once the project is all done…
DaddyLysle
says:I too have made my own loom but since I was doing belts 32 #11 beads wide and 40 inches long I screwed a 2″ high board onto each end. then put 5 screws into the ends to secure the threads. On the top of these two boards stretched a small spring and screwed the ends down in to the top of the vertical boards when I had the correct spacing for the beads.
Making pencil marks on the board helped in the placement.
I then run the thread back and forth and around the screw nearest the slot till I have 33 warp stringers.
then I use a 3.5 inch riser/tension-er.I also put the same type of spring on top of the tension-er.
I like to use a 5″ split body beading needle.
Anne Andreas Little Fox
says:Blessings and Lili Pilamaye for these teachings . Sharing with credit given to you .
Robert Trout
says:ty fore sharing this,, I have a beading loom I love makin jewelry.. havnt been doing long so im still learning
Dr. Paulajean (PJ) Anne Anderson
says:I like your simple version of a beading loom. If you have been following me on Facebook I too have created my own beading loom and really have been using it. I actually made Christmas gifts last year by creating head-hatbands.
Taino Charlie
says:Very Nice thank you for sharing this i think your sharing this was giving and many blessings.Aho Daca Taino means I am Taino Native and i give thanks to you.Aho